Connecting Node.js with Dynamics 365 Business Central
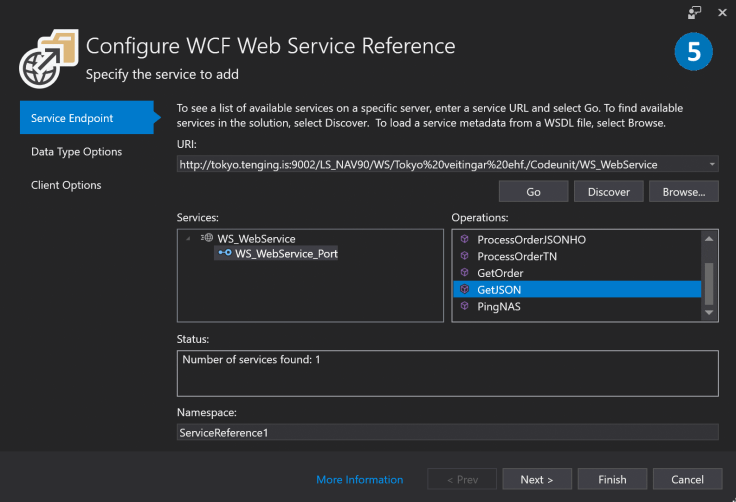
In this article, I will guide you on how to transfer data between Dynamics 365 Business Central and Node.js in JSON format. The approach to creating a Node.js BC365 middleware is similar to the one in our previous article on creating a .NET Core NAV middleware. In that article, we described how to publish a codeunit with an entry point function “GetJSON” using SOAP and OData V4.
This article will focus on the following topics:
- How to transfer JSON data between Node.js and BC365.
- How to consume a published codeunit and build an API to manage BC365 data using Node.js.
- How to leverage AWS Cloud and serverless architecture to host a Node.js application.
- How to use Bitbucket and Pipelines to automate publishing and development processes.

Creating GetJSON entry point function
In Dynamics 365 Business Central, it is feasible to expose a function as a web service action using OData V4. This represents a more advanced and modern approach to interacting with 365 Business Central, surpassing the SOAP Web services method.
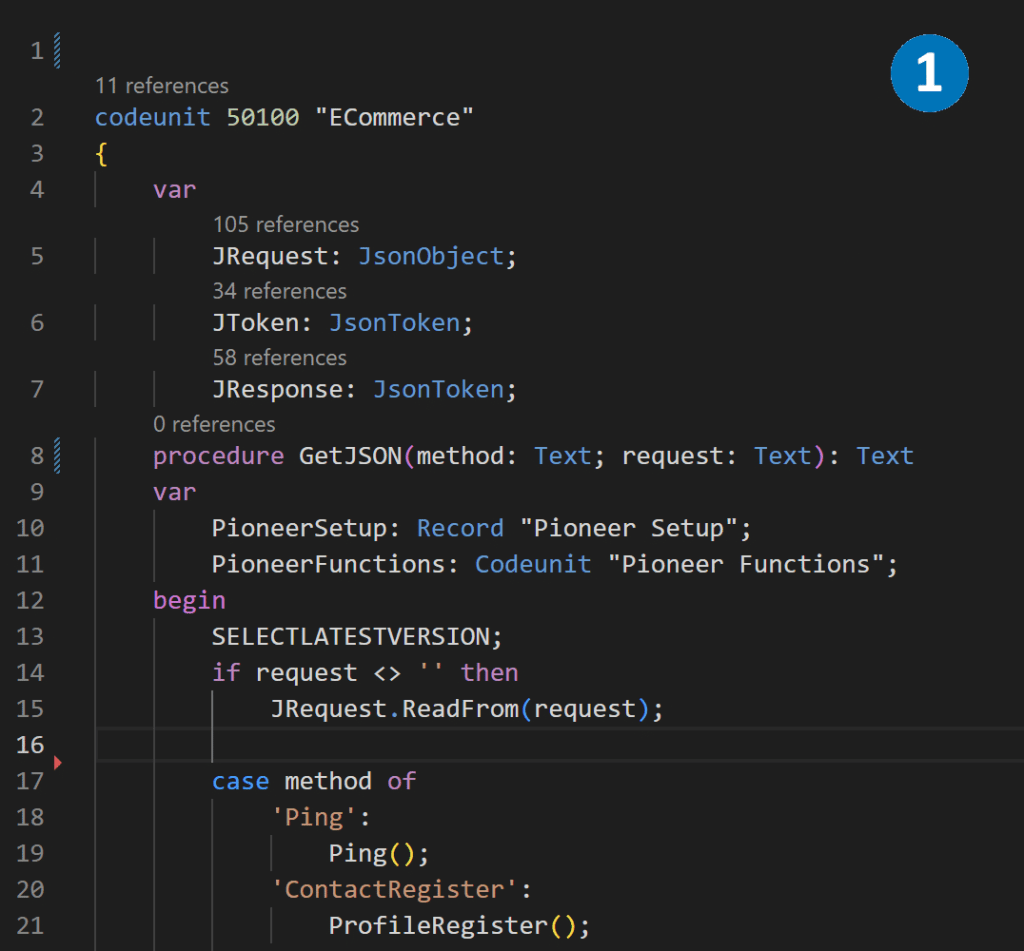


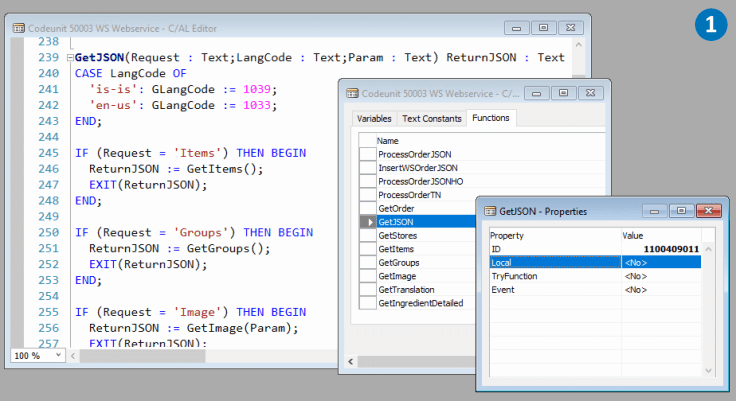
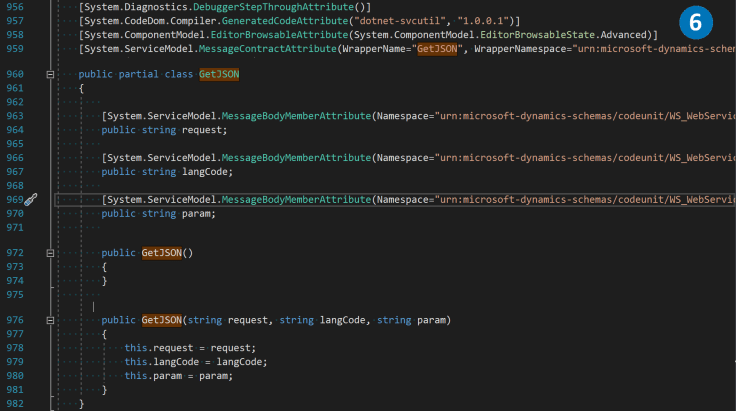
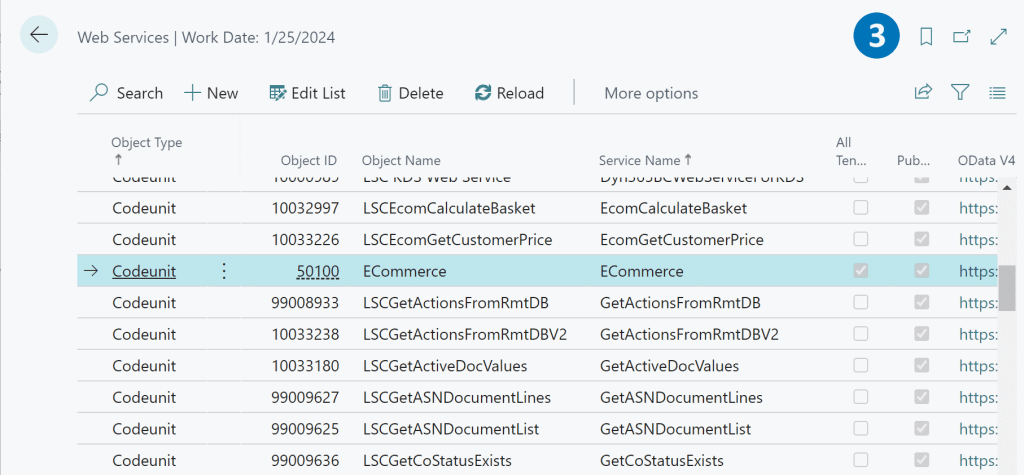
- Using Visual Studio Code, we can create codeunit with GetJSON function. This function takes method and request as input parameters and returns text in JSON format. GetJSON is the central entry point, and depending on the method, it distributes data to the internal functions of the Codeunit..
- As an example, we can create a Ping function that simply sends to the output whatever it receives as an input parameter.
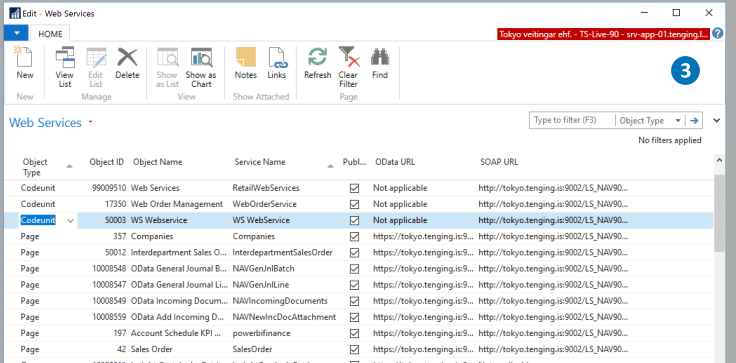
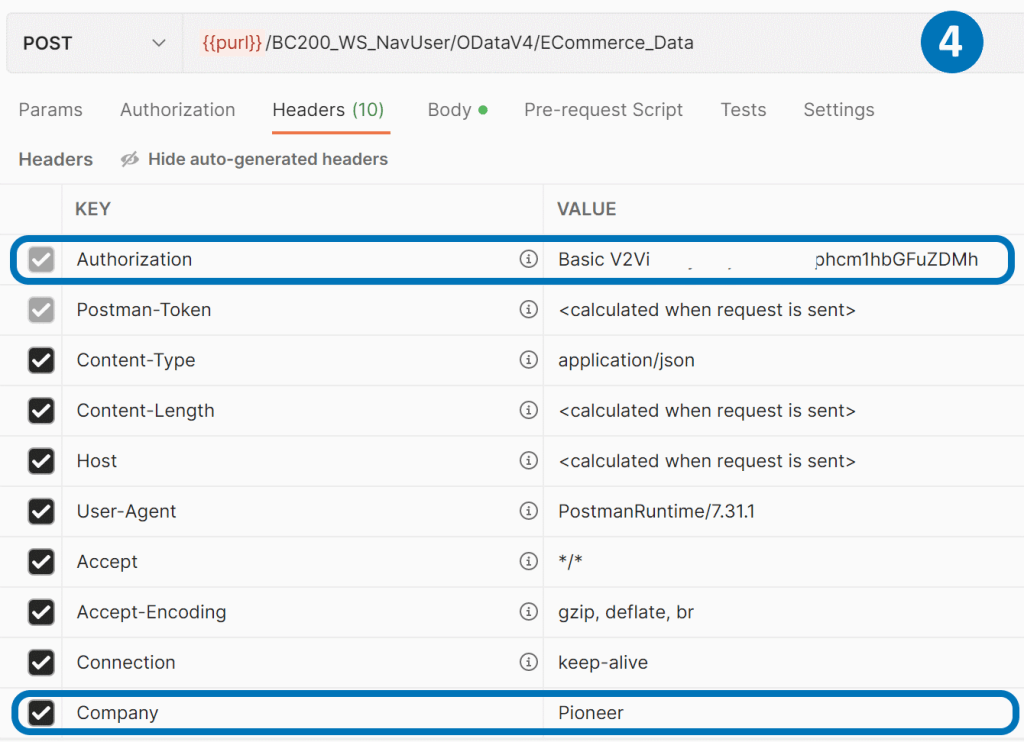
- Codeunit is published as an OData V4 service.
Using node-fetch library to retrive data from GetJSON function.
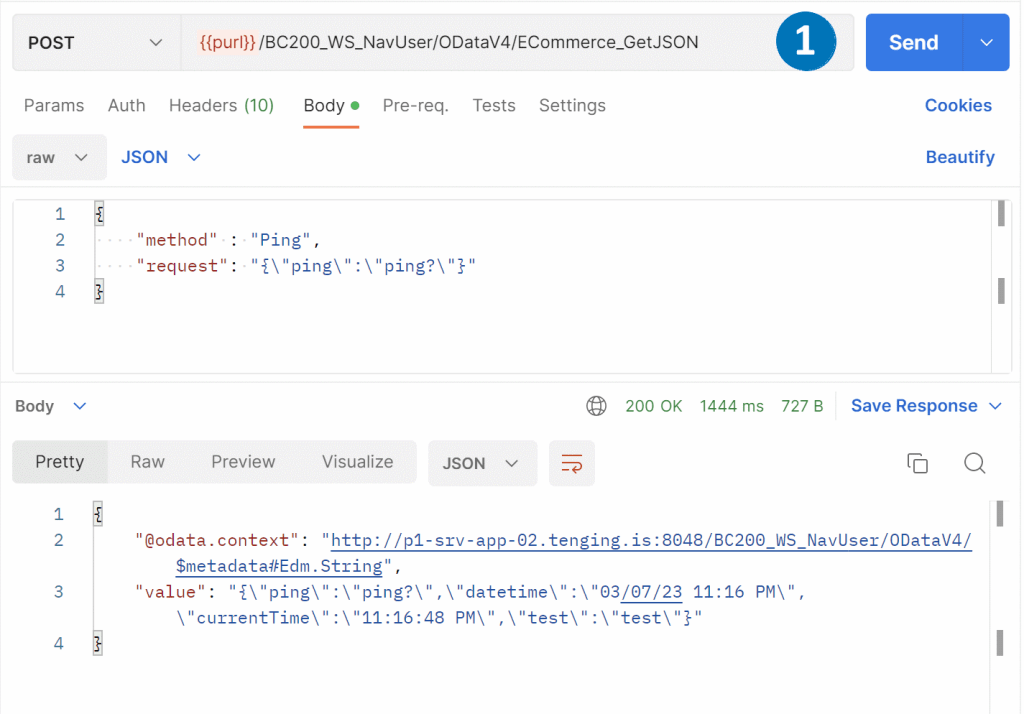
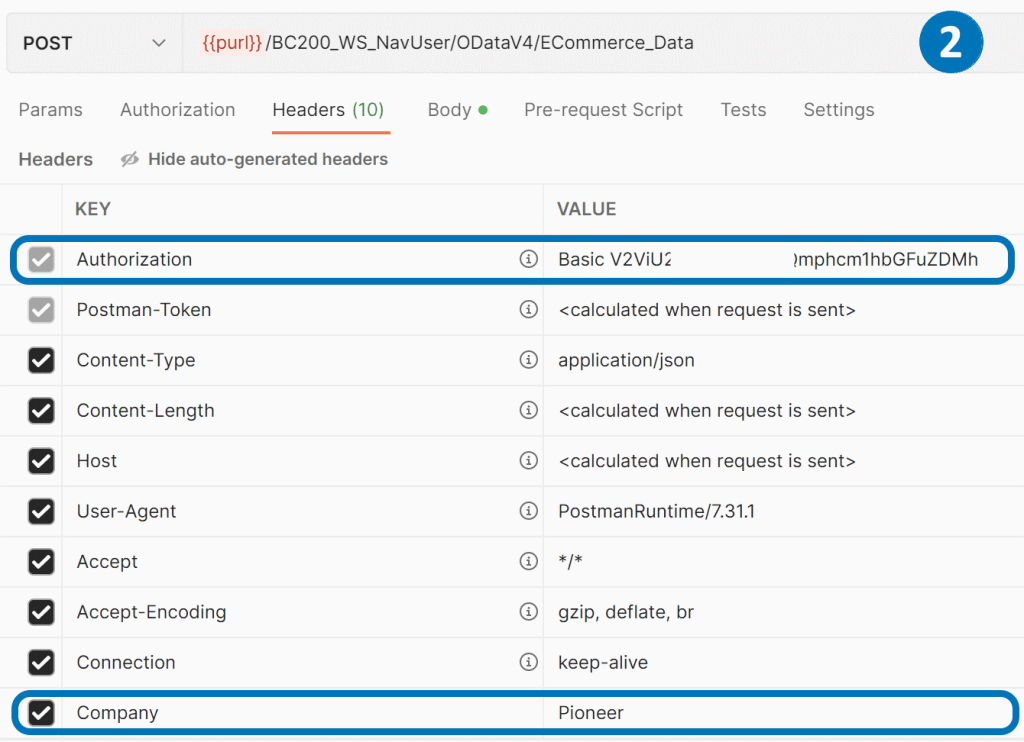
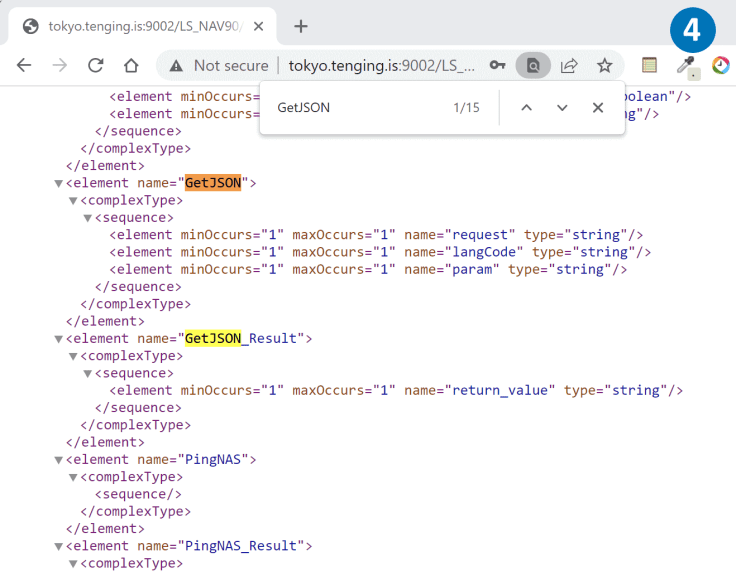
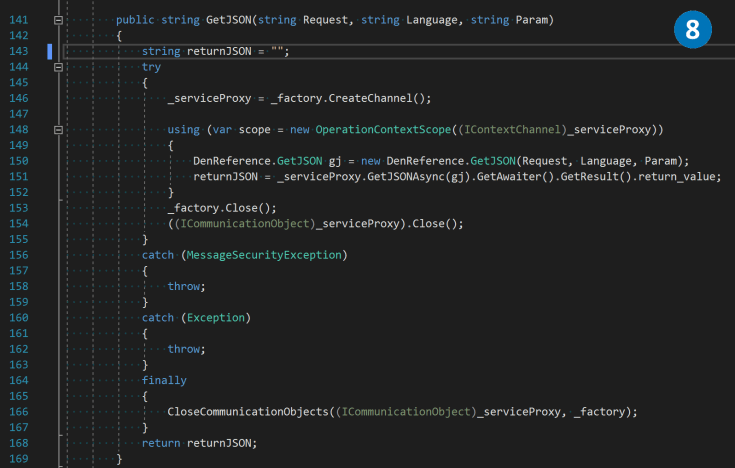
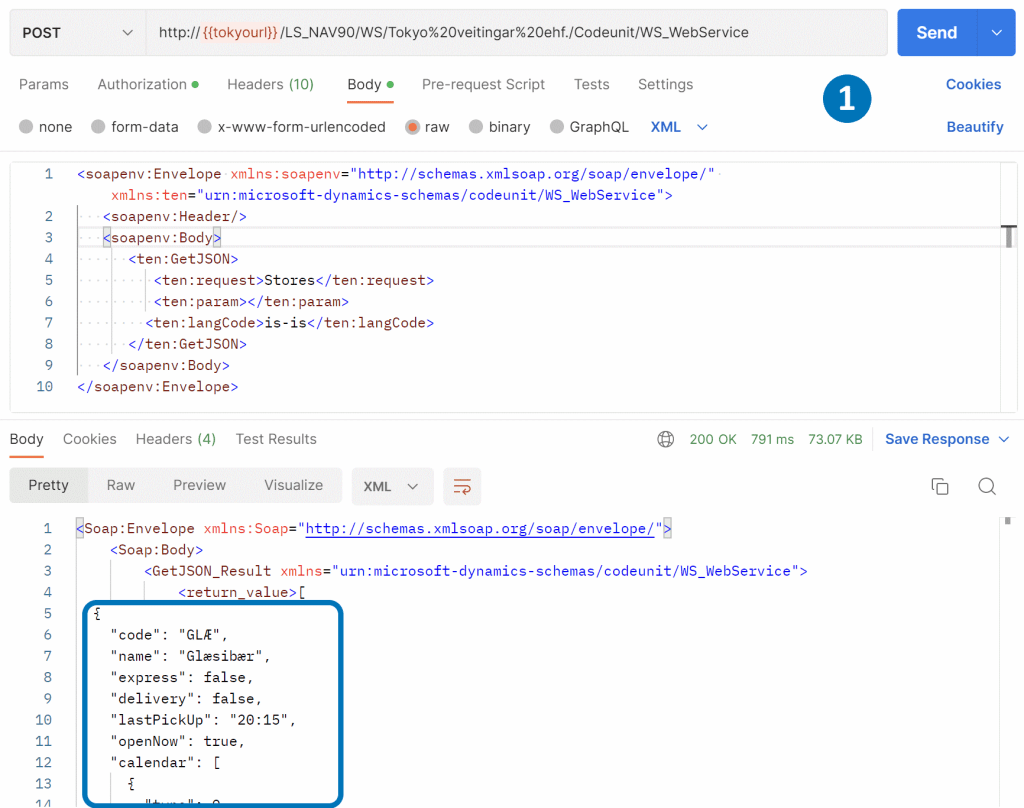
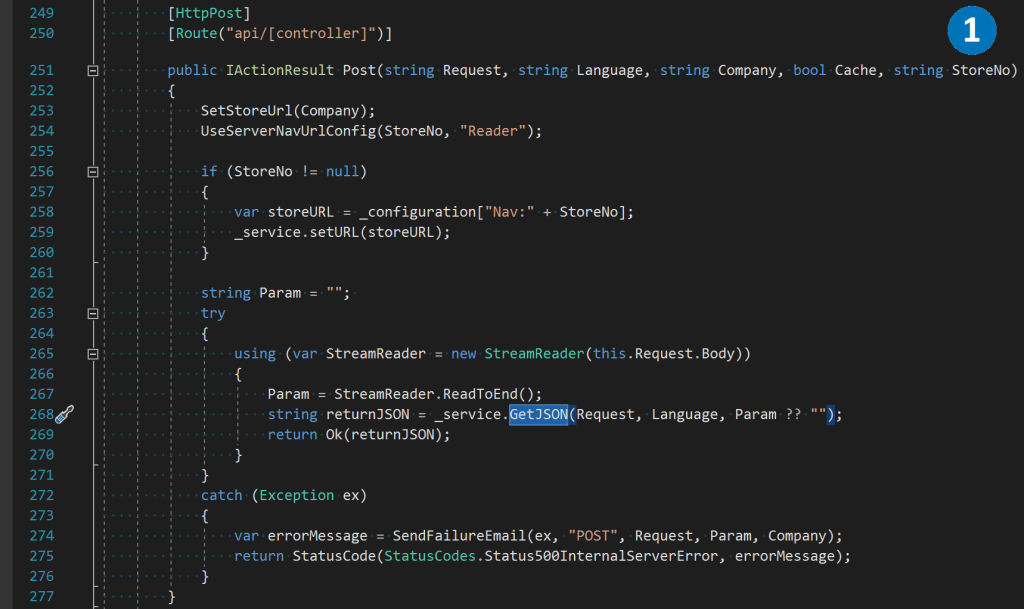
- Once we’ve published the Codeunit via OData V4, we can access it using the URL https://BaseUrl/NAVMiddleTierName/ODataV4/CodeunitName_FunctionName. The JSON object we pass in the body should match the input parameters of the GetJSON procedure, which includes the method and request in text format.
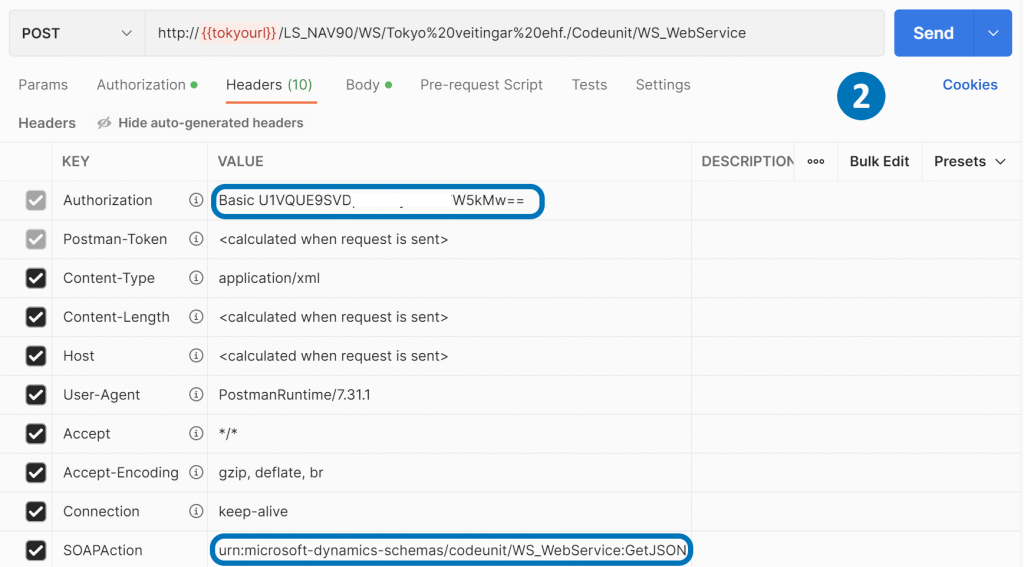
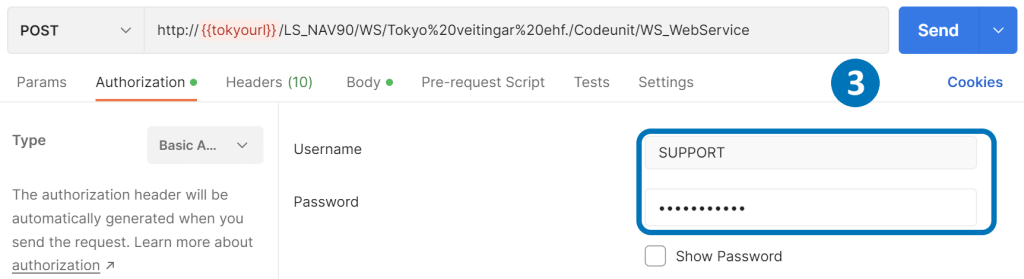
- To ensure a successful POST call, we need to include special headers, such as the Authorization and Company name.
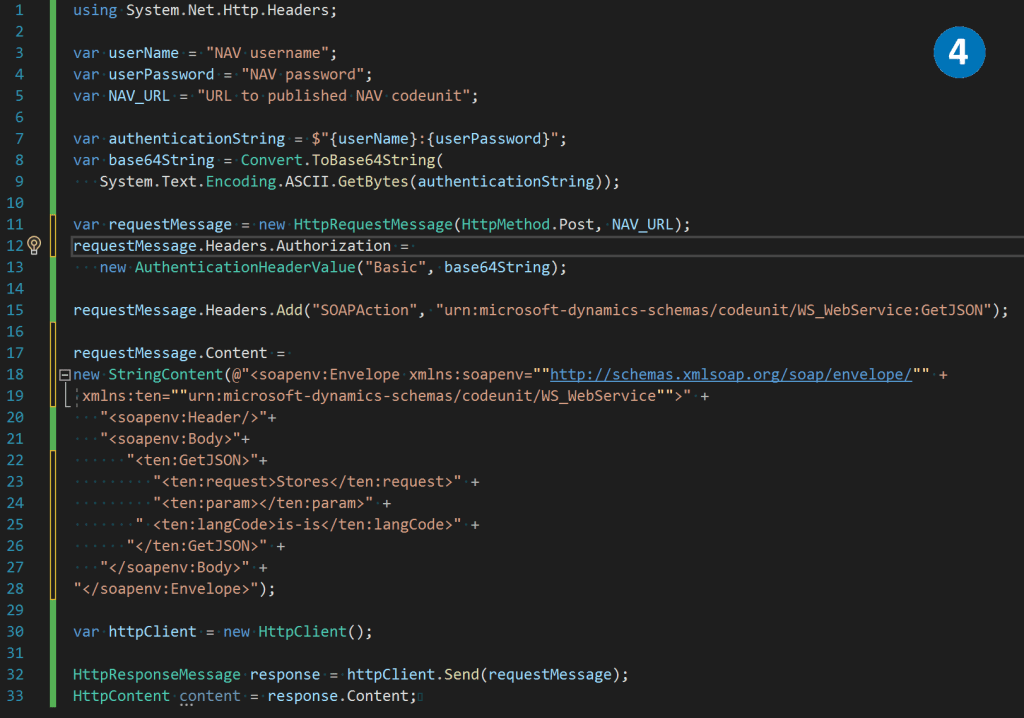
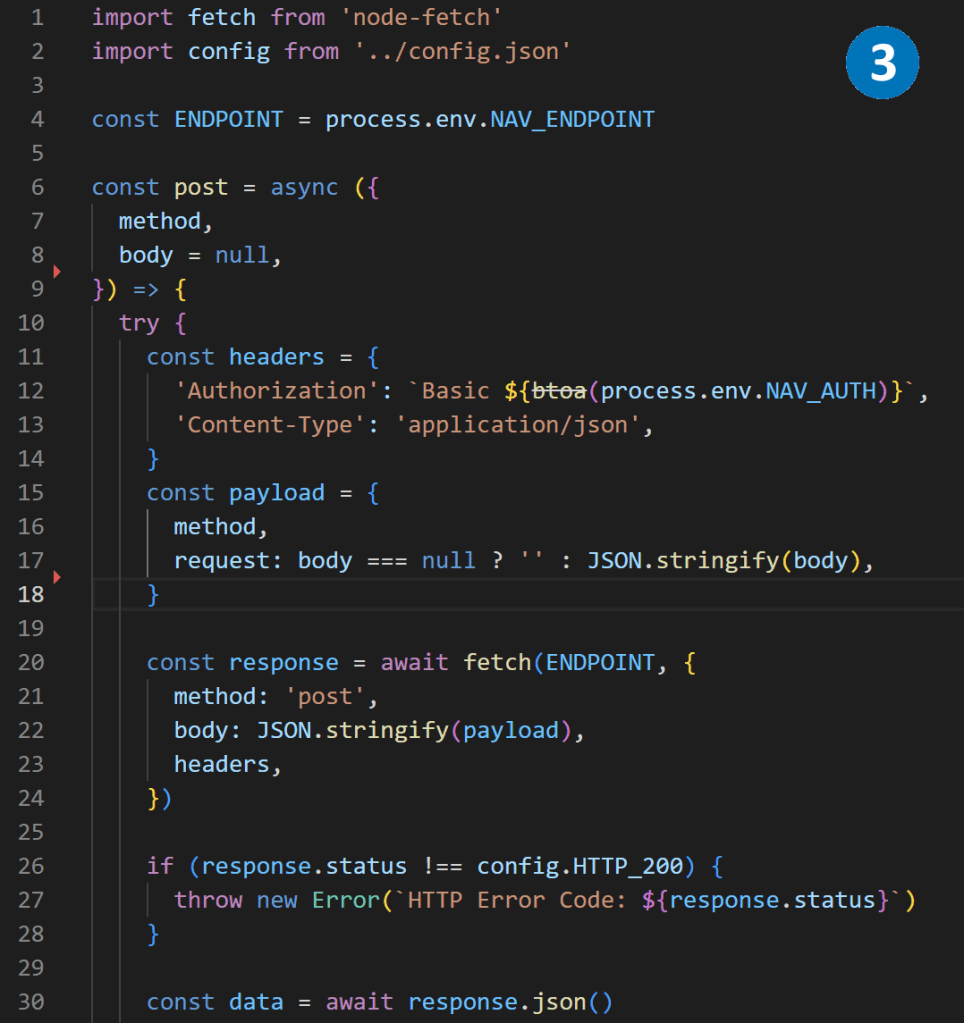
- We can use the node-fetch library to retrieve the JSON data from BC365 by making a call to the URL.
Building API to manage BC365 data with node.js.
After successfully receiving BC365 data in Node.js, the next step is to build an API and expose it for implementation by other systems. One way to do this is to use the AWS cloud to host the Node.js application and a serverless model to manage it. By using serverless architecture, we can focus on writing code rather than managing infrastructure. AWS provides several services, such as AWS Lambda and API Gateway, that can be used together to create and deploy serverless APIs quickly and easily. With a serverless approach, we only pay for the resources our application consumes, and we don’t have to worry about scaling, availability, or security.
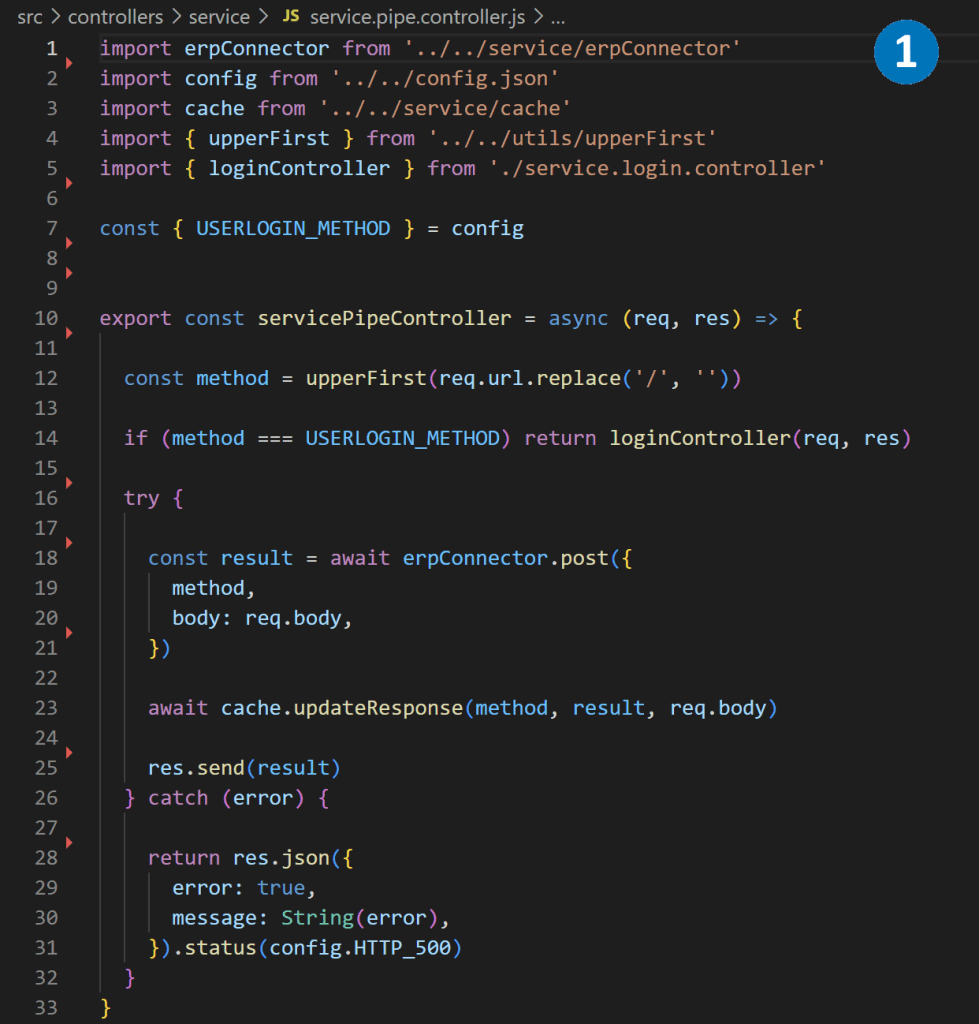


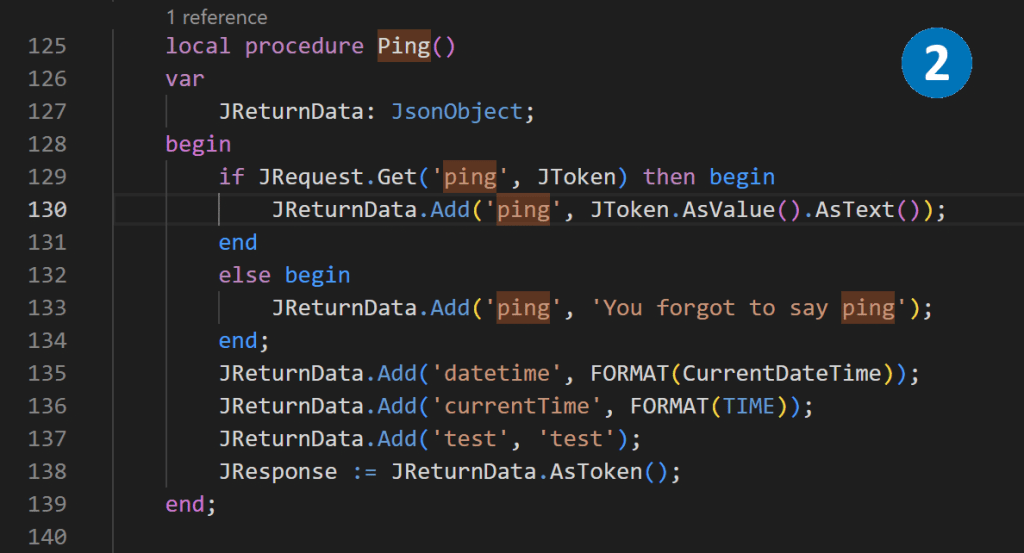
- We can use the express.js library to write a controller that manages incoming HTTPS requests and passes them to the BC365 Codeunit function GetJSON. This library allows us to configure routing names, request types, error handling.
- After wrapping, the API looks more friendly for consumers and requests can be called anonymously. We can even add caching, JWT authorization, and other features at this level.
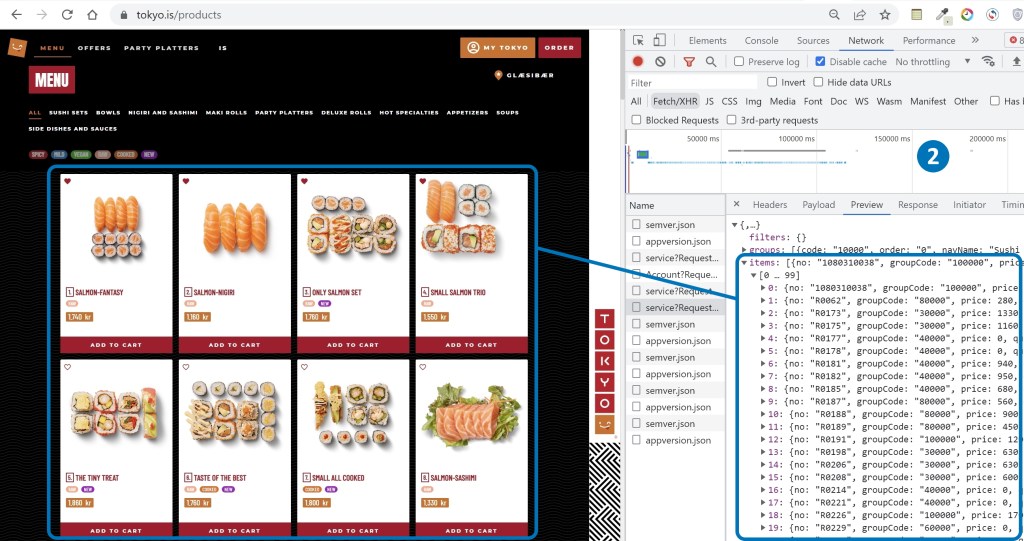
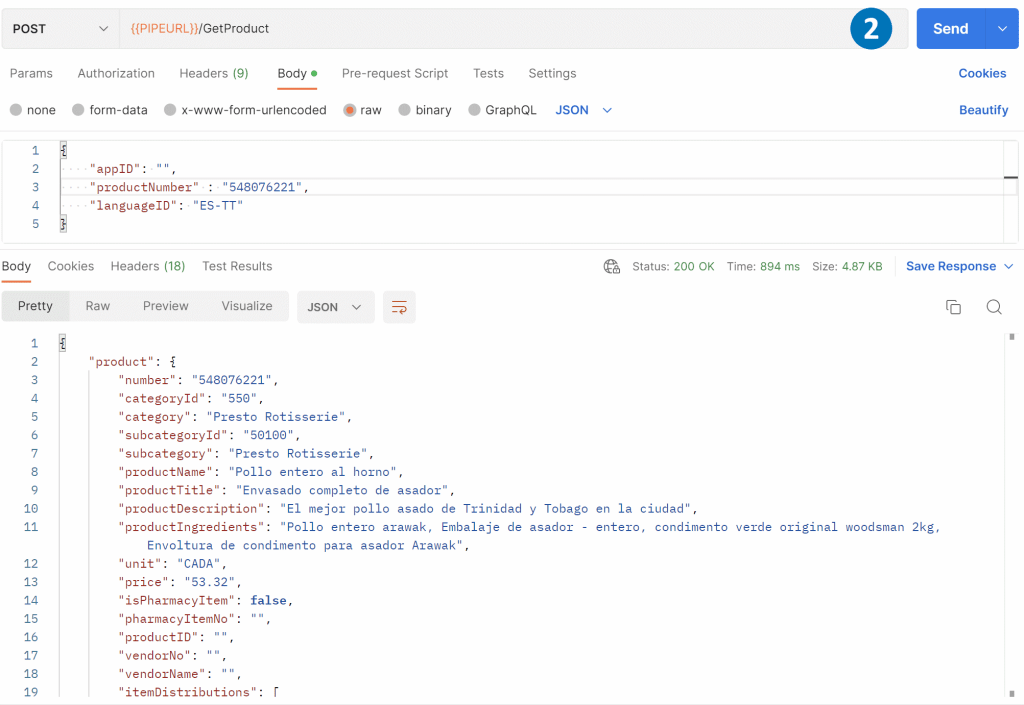
- With the API wrapped, it’s ready for frontend developers to use in building web and mobile applications. For example, they can use the API to get product information and display it on a web page.
- To host the node.js application on AWS, we can use a serverless. yml file to describe the application’s functions, resources, plugins, and other necessary configuration information. This prepares the application to be hosted on AWS Lambda using a serverless model.
Hosting Node.js BC365 middleware as AWS Lambda.
AWS Lambda is a serverless compute service that enables running code without the need to provision or manage servers. Serverless architecture allows for launching apps only when needed. When an event triggers the code to run, the public cloud provider dynamically allocates resources for the code. The user stops paying when the code finishes executing, leading to cost savings and greater efficiency. Additionally, serverless architecture frees developers from the routine and menial tasks associated with app scaling and server provisioning, allowing them to focus on writing code and building applications.
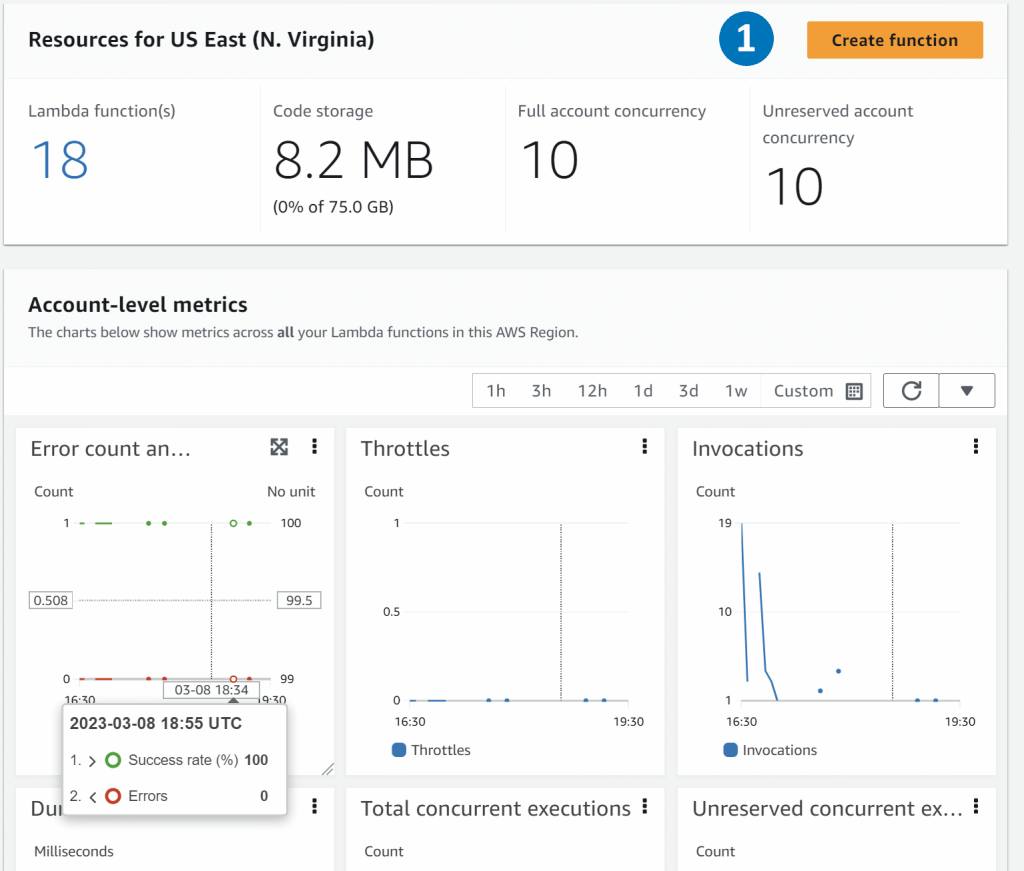

- The Lambda service comes with seven metrics for your functions out of the box. Invocations, duration, error count, throttles, async delivery failures, iterator age, and concurrent executions.
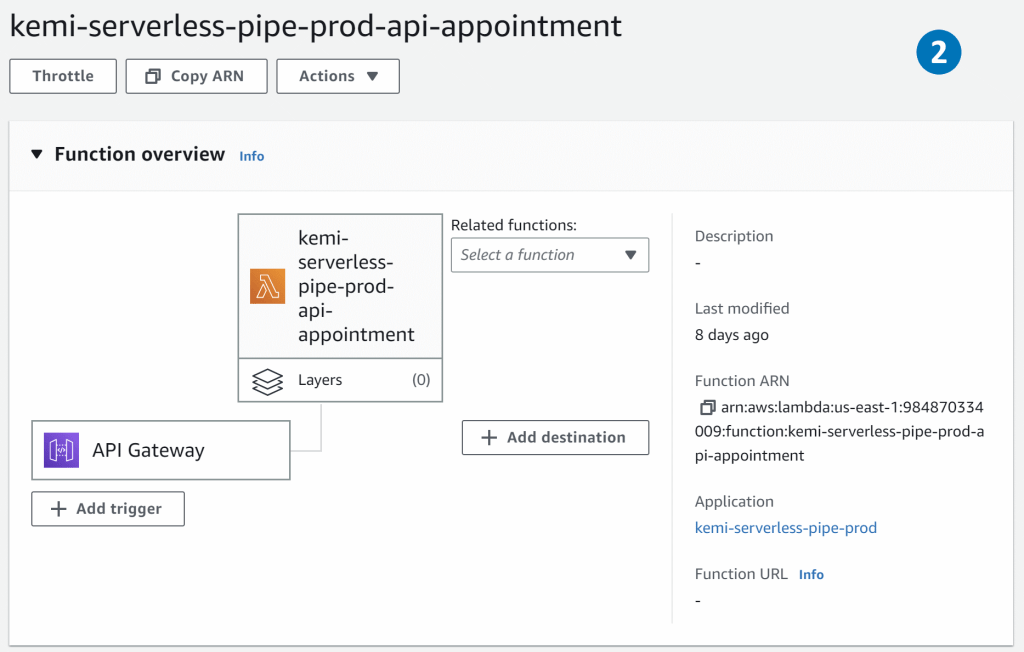
- The function overview feature helps you to see triggers, layers, and destinations associated with your function. You can also view AWS services or resources that invoke the function, resources that contain libraries, custom runtime, or other dependencies.
- CloudWatch Logs allows you to centralize the logs from all your systems, applications, and AWS services that you use, in a single and highly scalable service
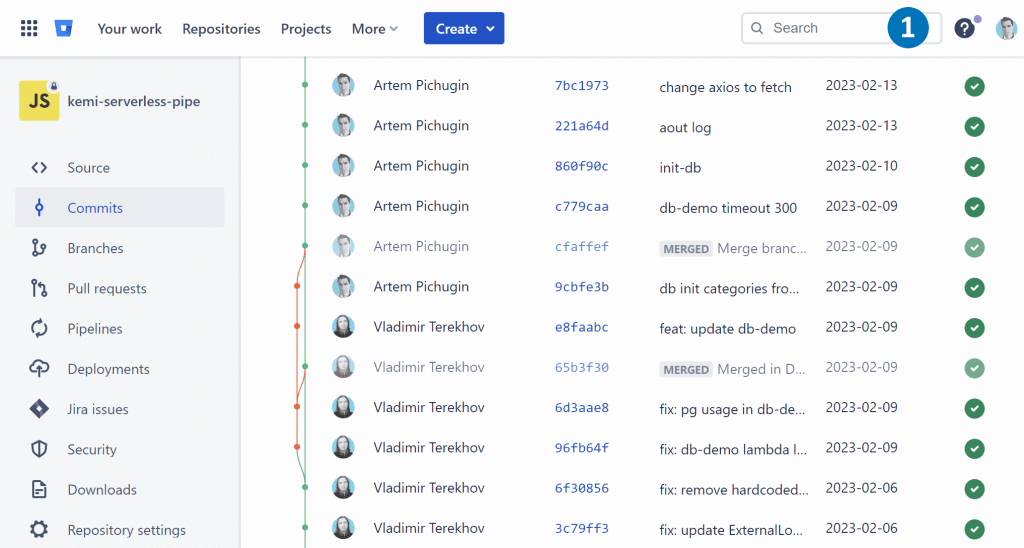
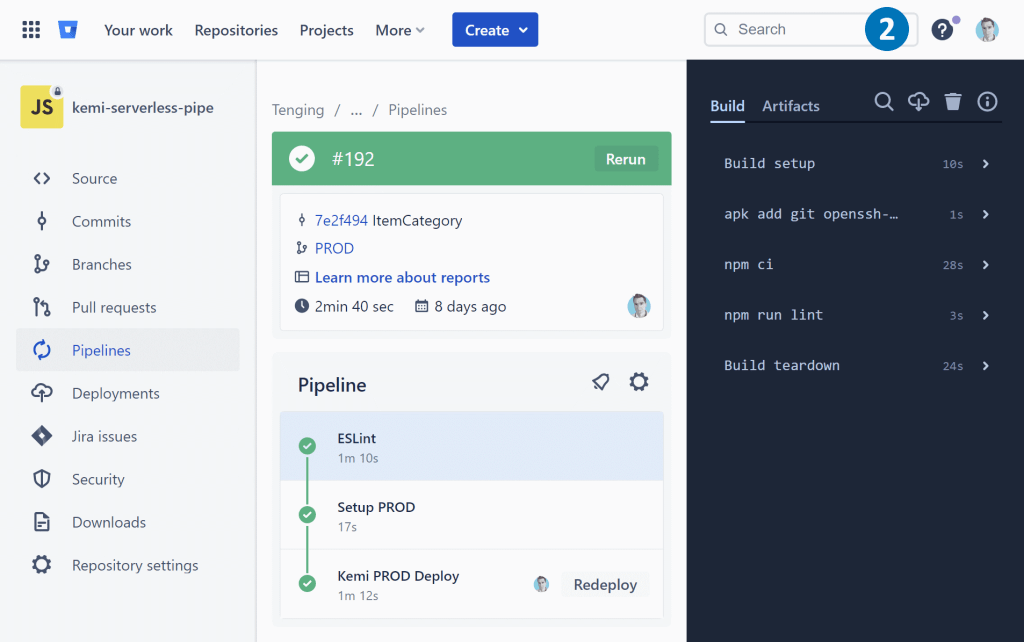
Using bitbucket pipelines to deploy Node.js BC365 middleware.
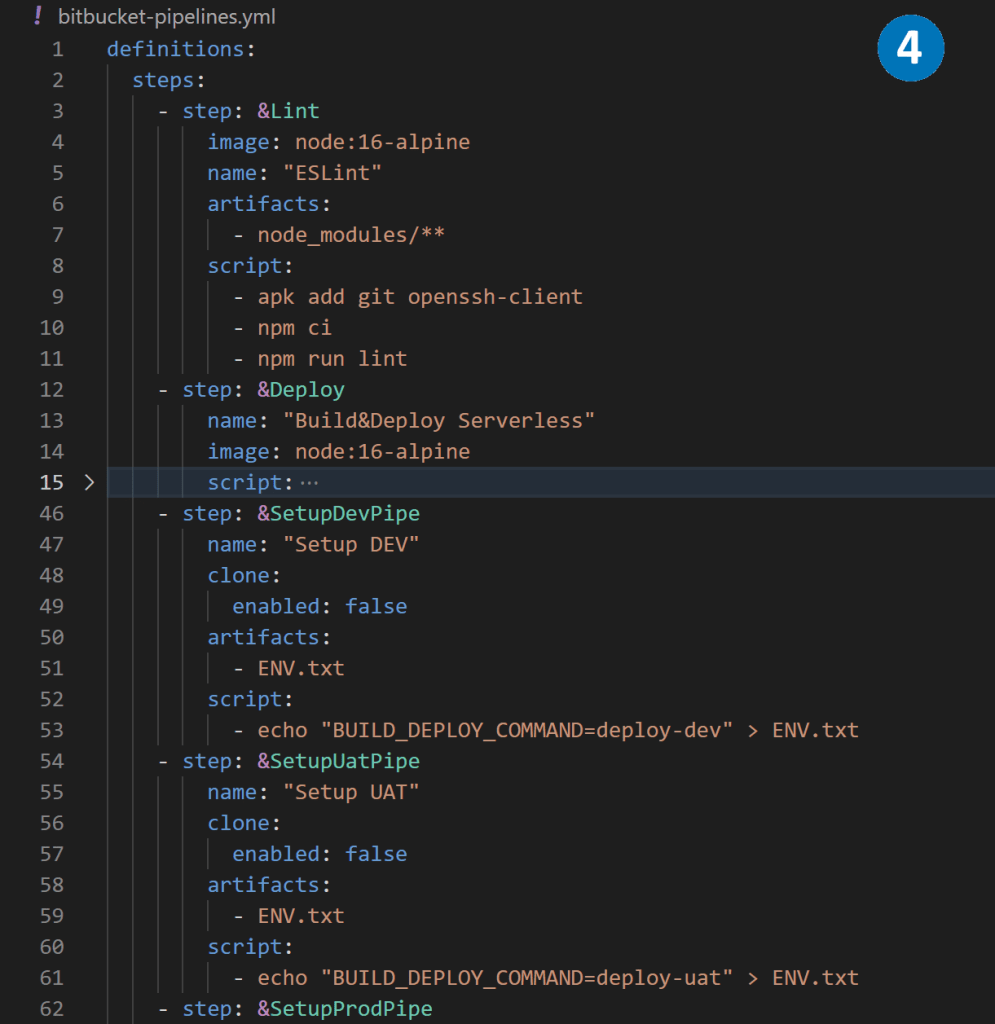
Bitbucket Pipelines is a comprehensive CI/CD service that comes integrated with Bitbucket. It allows developers to automate their build, testing, and deployment processes using a configuration file in their repository. This configuration file is called bitbucket-pipelines.yml and is usually located at the root of the repository.
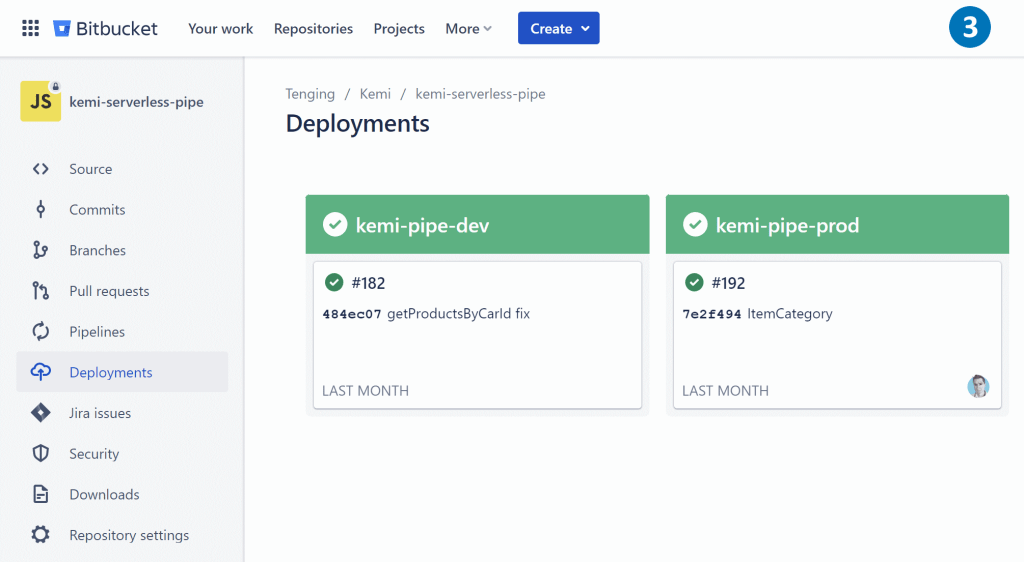
With Bitbucket Pipelines, developers can define a pipeline that consists of multiple stages, each of which can have one or more jobs. These jobs can be used to build and test the code, generate artifacts, and even deploy the code to different environments.
By setting up a Bitbucket Pipeline, developers can streamline their development workflows, ensure the code quality, and rapidly deliver their applications to production.